- Install latest version of Go from here: https://go.dev/doc/install
- Check where go is installed by running the following command in your terminal:
go env GOROOT
- And add the following to your .zshrc or .bashrc file:
## not required if you're only using Go modules
export GOPATH=$HOME/go
export GOROOT=/usr/local/go
## required
export PATH=$PATH:$HOME/go/bin
- Verify installation:
go version
- Install claat by following instructions here: https://github.com/googlecodelabs/tools/tree/main/claat#install Or since you have installed Go, just use:
go install github.com/googlecodelabs/tools/claat@latest
- Verify claat installation:
claat help
- Download this repo or clone it: https://github.com/googlecodelabs/tools
- Navigate to this folder and then go to site folder:
cd tools-main/site
Please Note: This codelab needs older node and python versions - which have already reached end of life. But when it works, it works! So let's not break it.
We will use nvm as package manager for node and pyenv for python.
- Let's install them beforehand.
brew install nvm
Now let's setup Node version first:
- Add a new
.nvmrcfile so that you can always remember the right node version to use for claat.
touch .nvmrc
open .nvmrc
- Add
12in the.nvmrcand save it. - Next install this version by running:
nvm install
Use nvm use everytime to switch to using this version when in this repo!
- Let's fix up our Python. We will use pyenv as package manager for managing python version.
pyenv install 2.7.18
- Next run the following command so it creates a
.python-versionfile and uses it to always choose the right python version when working in this directory:
pyenv local 2.7.18
- Next, we need to install
gulpandgulp-cliand also other dependencies:
npm i gulp
npm i -g gulp-cli
npm i
Setup is ready! Run:
gulp serve
Hooray! It works 🎉
Time to open this in an IDE if you have not already!
- Let's create a new folder under
/sitecalled/codelabsand then another new folder/assetsunder/codelabs:
tools
|-- site
|--|-- codelabs
|--|--|-- assets
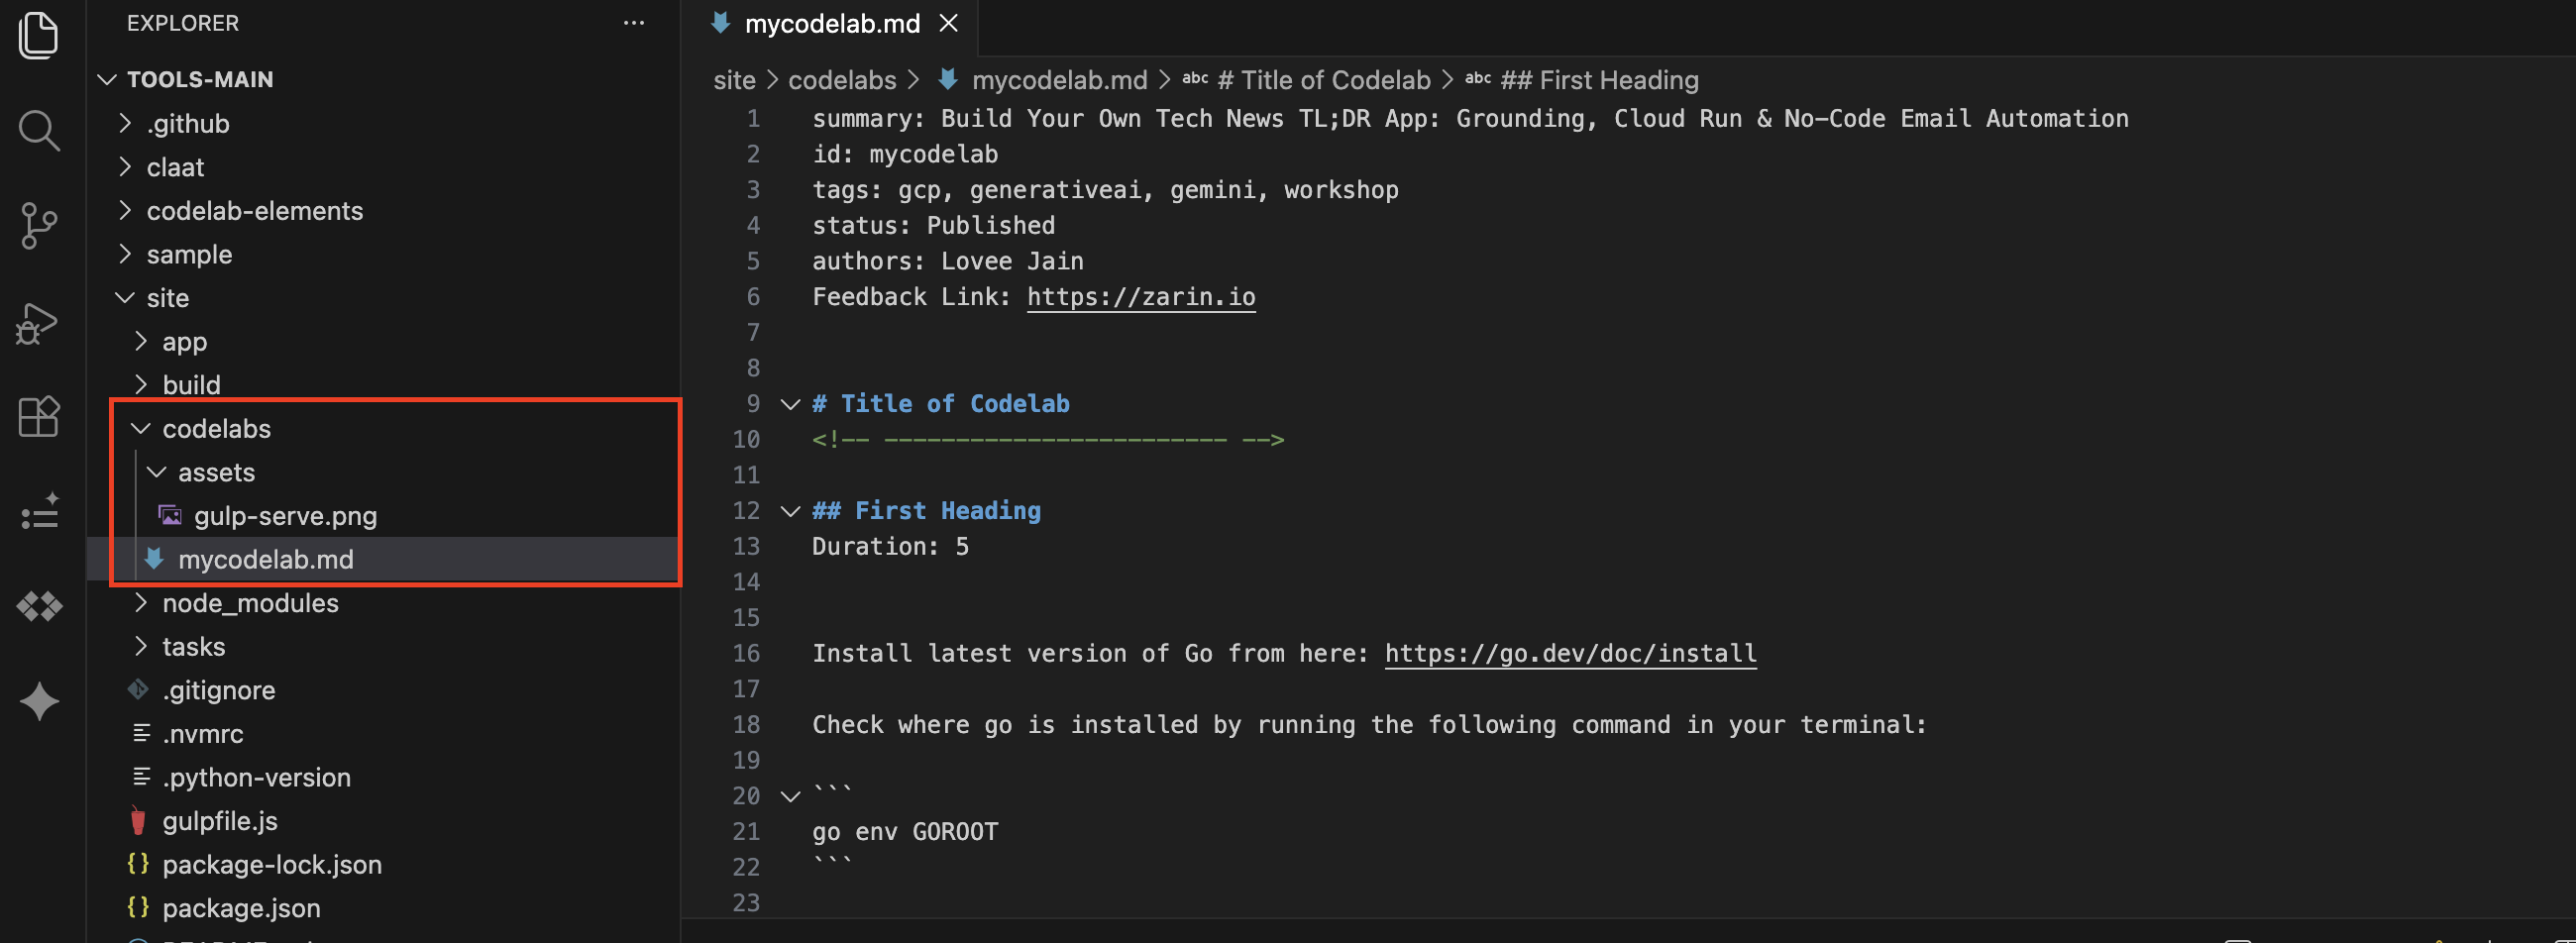
- Create a new file called mycodelab.md and structure like this.
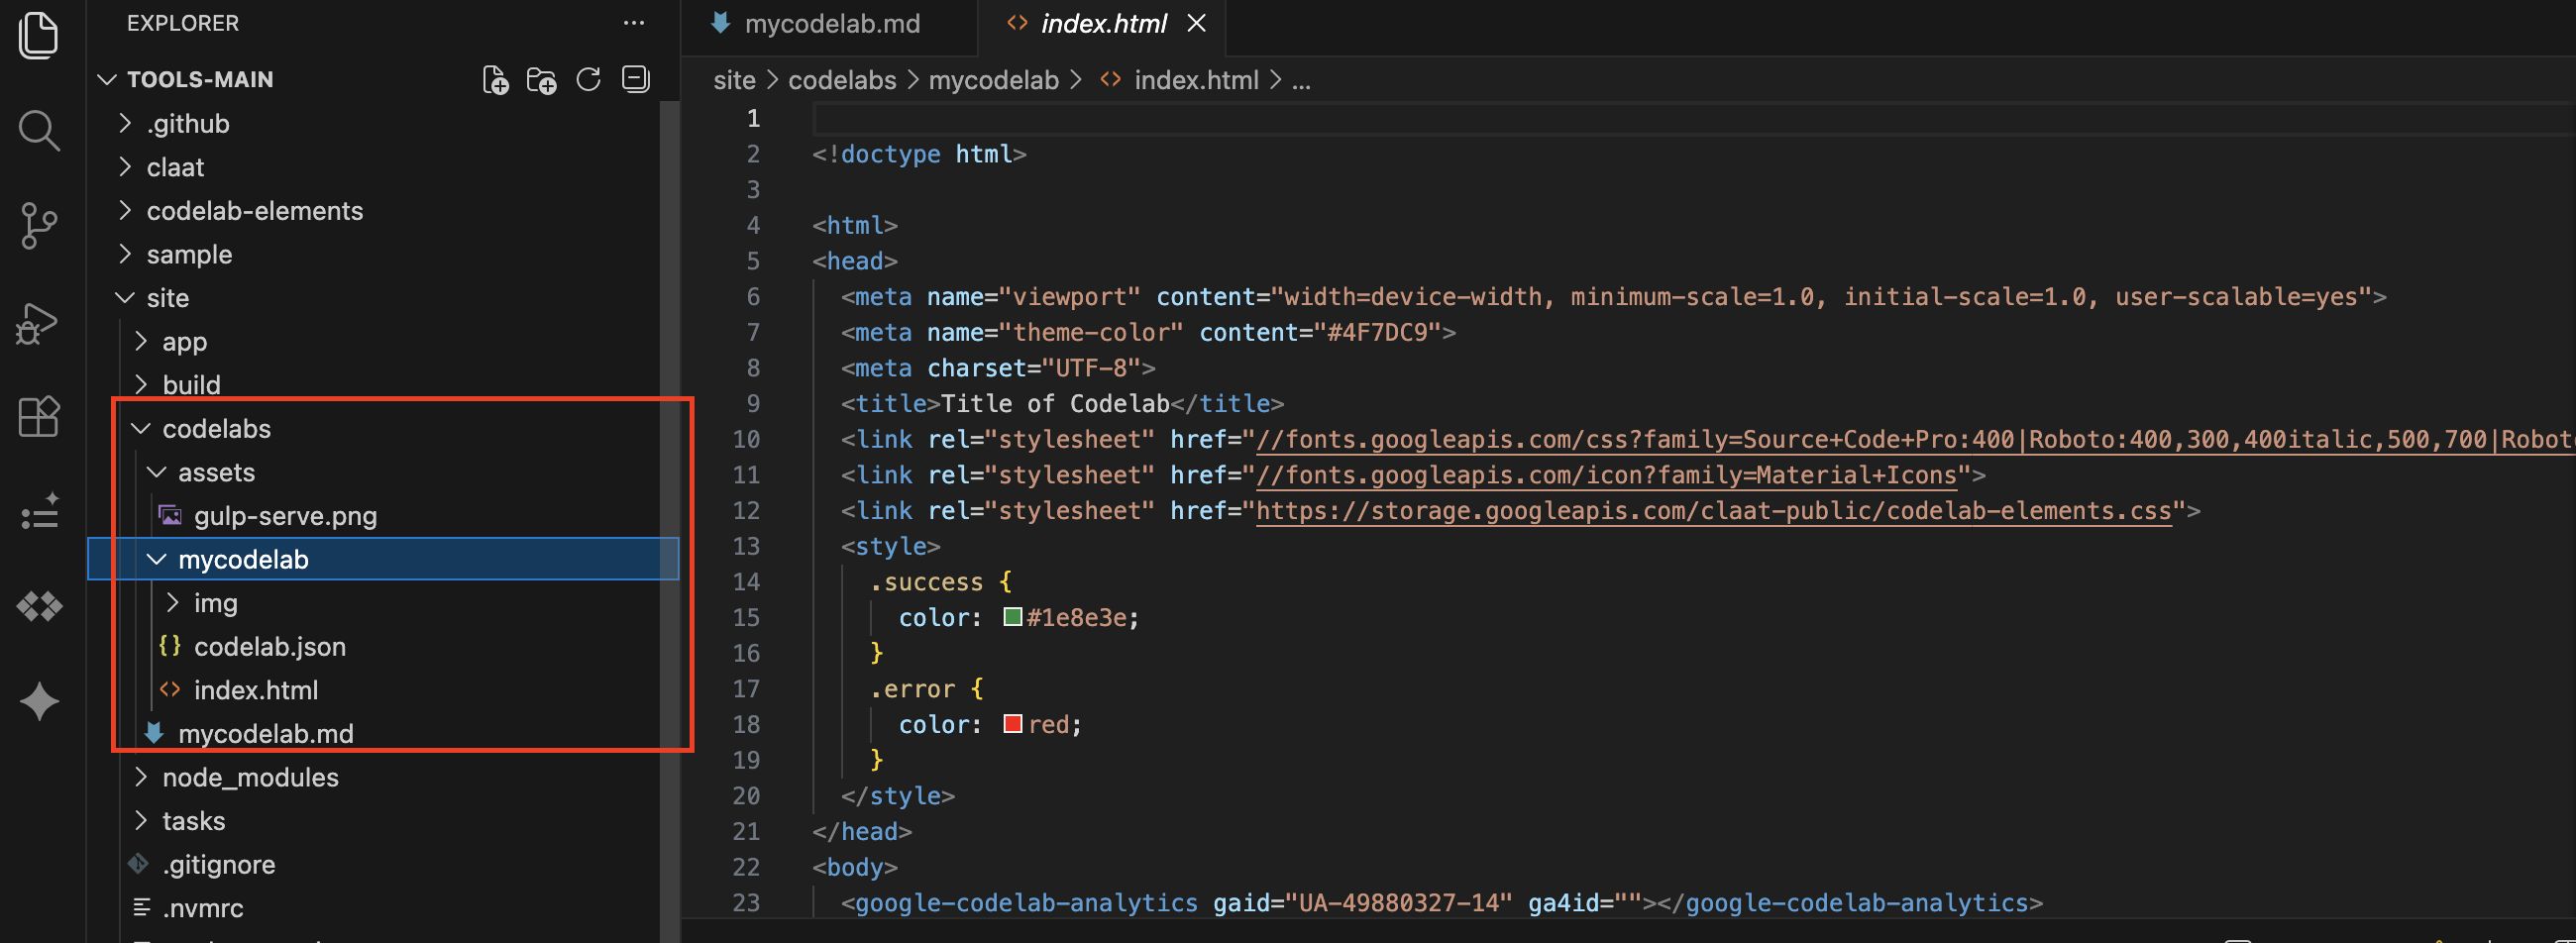
- Once you have your markdown saved, you now want to export it to HTML using the claat tool.
claat export mycodelab.md
Note: It will create a static site for you.
- Go back to
/sitefolder and run serve:
cd ..
gulp serve --codelabs-dir=codelabs
- Notice how now the older gulp serve screen comes with a codelab.
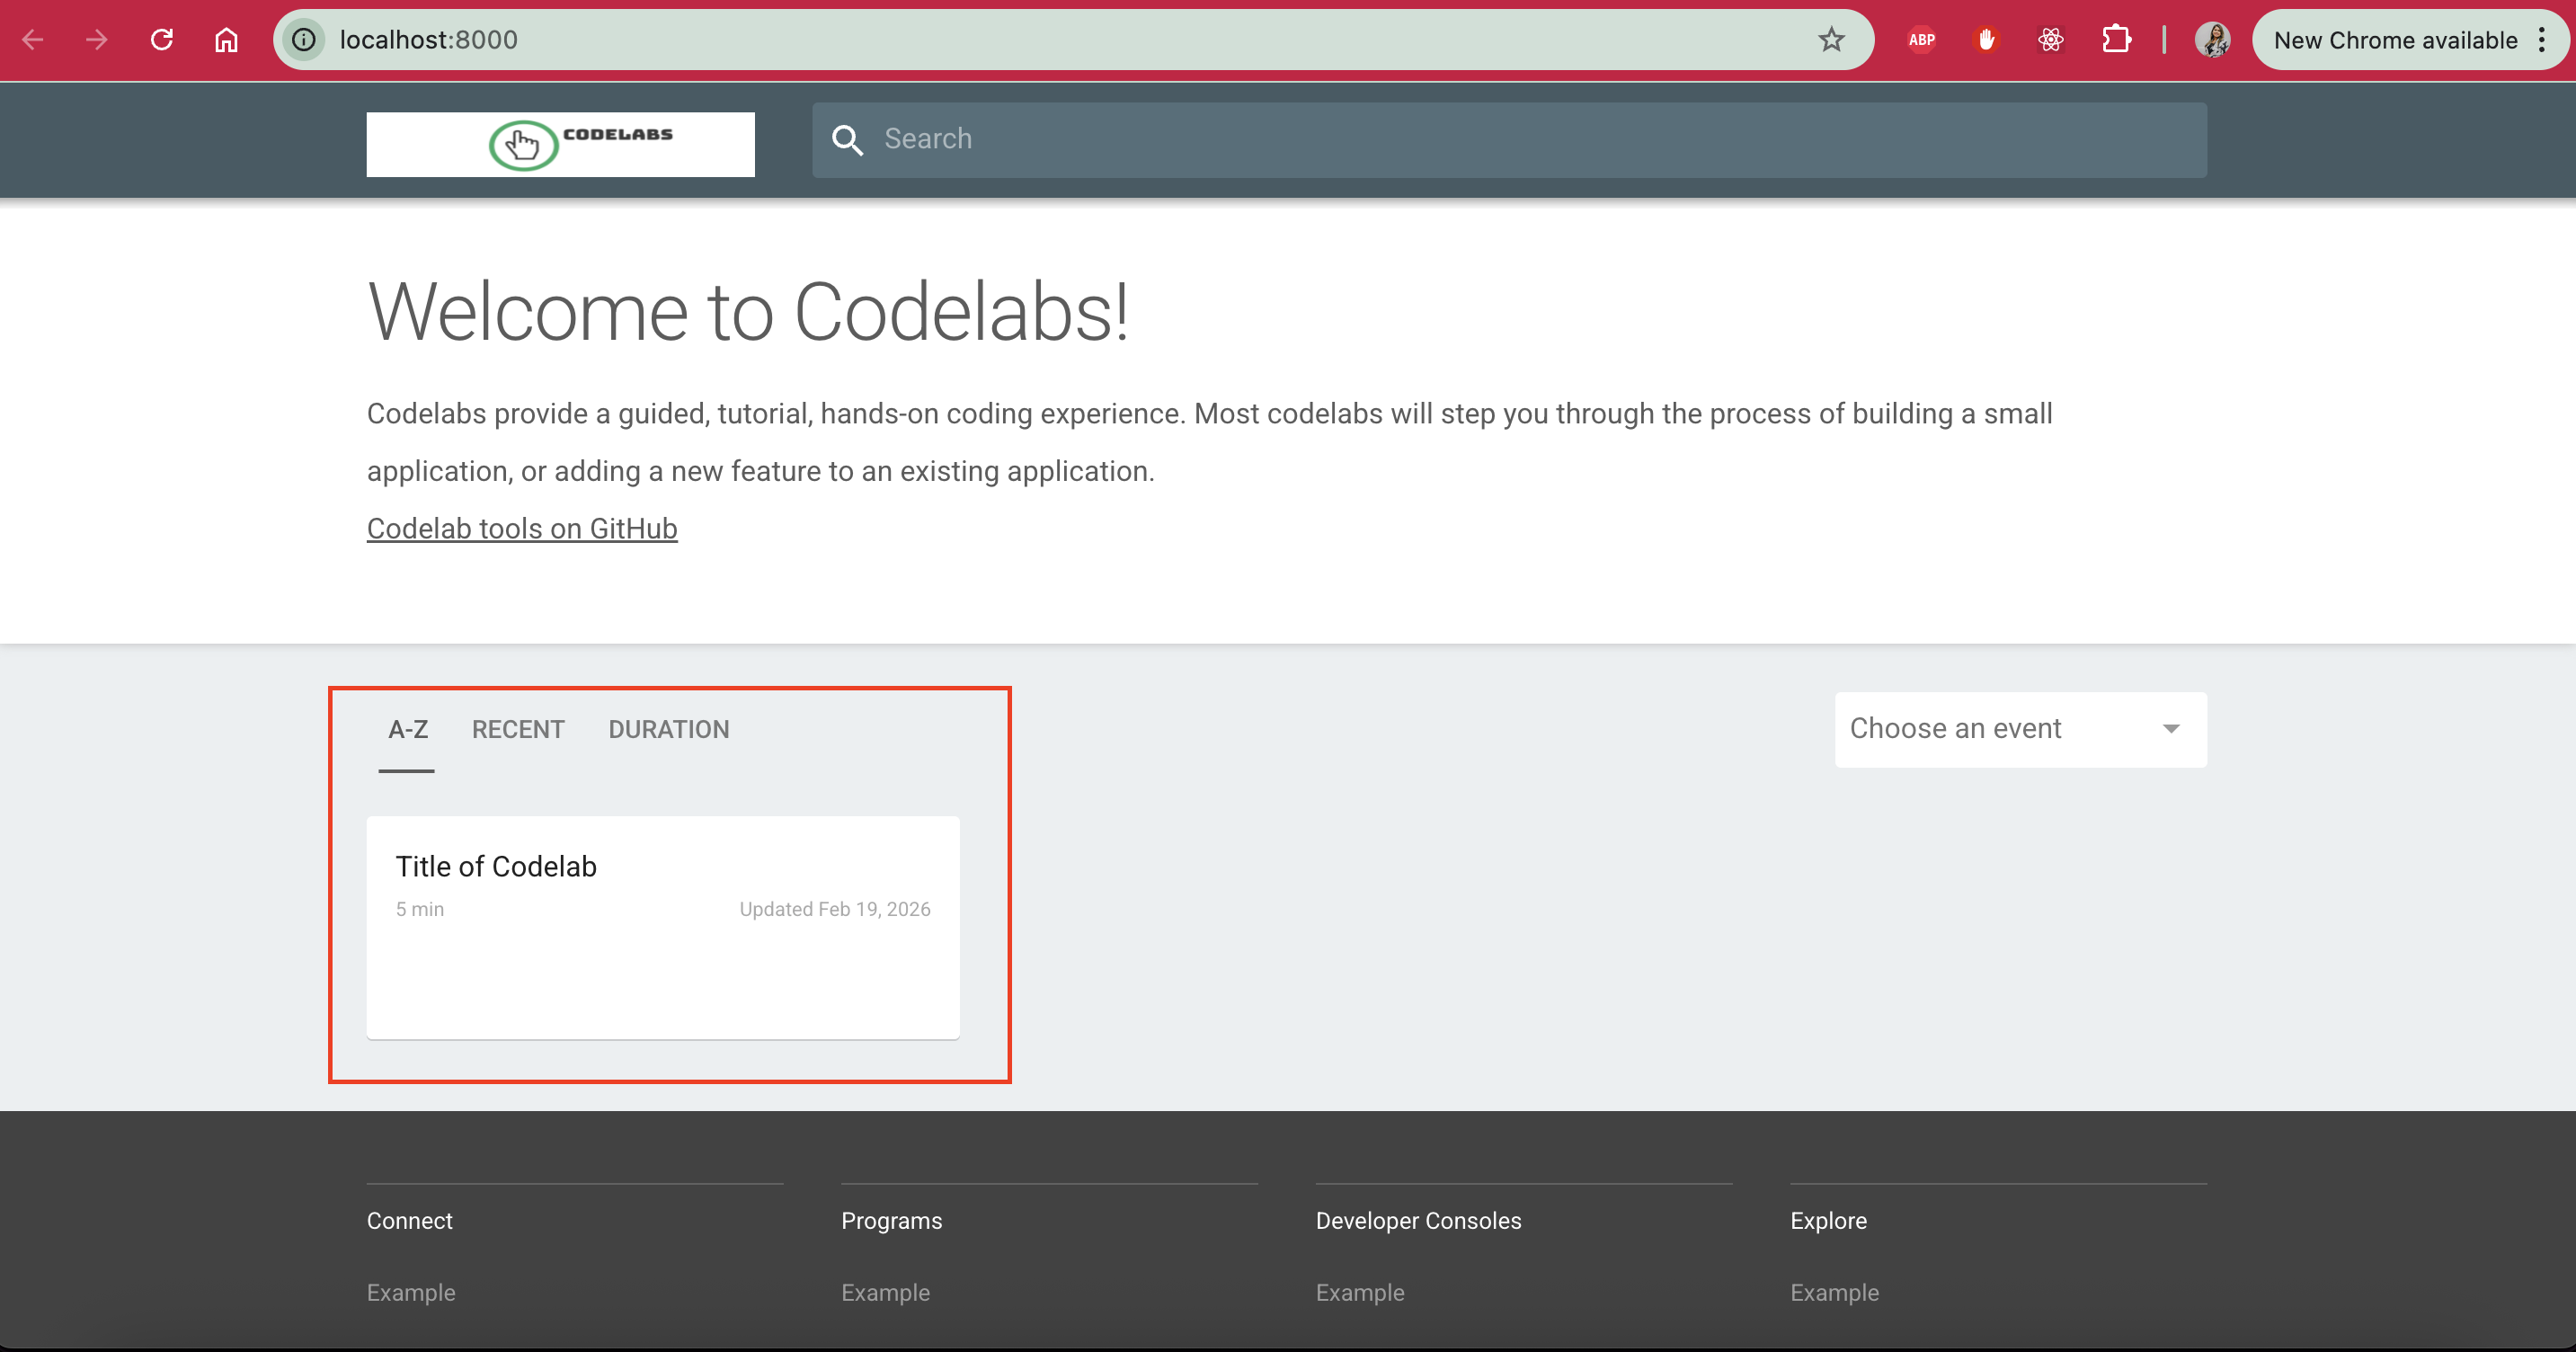
- Select the codelab - static site
Image
Use your markdown skills! Once you are happy we can move to next step - Deploy!!
You can either follow this quickstart: https://firebase.google.com/docs/hosting/quickstart or instructions here:
- Create a firebase project or use existing one.
- Install Firebase CLI. Please Note: Make sure to change the node version to latest for this bit.
nvm use node
npm i -g firebase-tools
- Check version:
firebase --version
[Optional] If you are using Firebase CLI for the first time, you might need to login, which you can do by:
firebase login
- Once ready, go back to
/codelabsand initialise the firebase hosting:
firebase init hosting
It will prompt you to provide some information such as the directory where the codelab is, if you want it to be a SPA (Single Page Application), if you want to configure CI/CD for github and most importantly, whether you want it to create an index.html - since you already have got it, don't let it override. And that's it! 
- Once the hosting configuration is done, you are ready to deploy!
firebase deploy --only hosting
- Once the deployment is complete you will be able to access your codelab at the hosting URL returned which usually looks like:
your-project.web.app